Daylilies are native to the Far East – China, Japan, Korea and Eastern Siberia. They have grown there for centuries, both in the wild and as a cultivated plant. The earliest uses were as an edible plant, with claims for medicinal qualities, and then eventually for ornamental purposes.
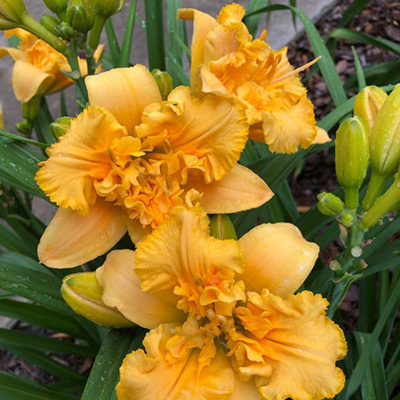
These original daylilies, Hemerocallis fulva, are still with us today. Known as ditch lily, tawny lily, homestead lily and a variety of other names, these primarily orange flowered plants are perhaps the best known of this species. They made their way from the Far East, through Europe, and eventually to the New World.
Around the start of the twentieth century, botanists began to experiment with hybridizing the native daylilies. Though most were of the orange variety, yellow and reddish varieties were discovered in isolated locations, and incorporated into the growing gene pool. The experiments by these early hybridizers showed that the color, patterning and form of the daylily could be altered, and opened the door for the tremendous variety available now.
In 1955, the American Hemerocallis Society was selected by the International Horticultural Conference to serve as the International Registry for all daylily cultivars. From its modest beginnings, there are now more than 56,000 registered daylilies, available in virtually every color, hue and tint. Although there is still no true-blue daylily, bluish hues are beginning to appear, and it may be only a matter of time and good fortune.
History is still being written.
For more in-depth discussion of the history of this fascinating plant, we recommend:

The world of daylilies, like most other pursuits, has its own unique ‘language’. Listed here are some of the more common terms and abbreviations.
PLOIDY
Dip – Diploid: A daylily with two sets of chromosomes.
Tet – Tetraploid: A daylily with four sets of chromosomes.
FOLIAGE HABIT
Dor – Dormant
The plant goes into a dormant state during winter. It will lose all its foliage, and over-winter with pointed foliage buds usually just beneath the soil surface.
Sev – Semi-Evergreen
The foliage of these daylilies will die back nearly to the ground in cold climates but will normally retain a showing of green just above the soil surface.
Evr – Evergreen
The foliage of these daylilies will be retained year-round.
SEASON
Because the bloom period will vary depending on the climate, the season of bloom indicators are relative to the Mid-Season, or Peak Bloom in an area. Mid-Season is defined as that period when the largest number of daylilies commence blooming.
EE – Extra Early: Bloom commences more than 2-4 weeks before mid-season
E – Early: Bloom commences 2-4 weeks before mid-season
EM – Early Midseason: Bloom commences 1-2 weeks before mid-season
M – Mid Season: Bloom commences during the peak bloom period
ML – Late Midseason: Bloom commences 1-2 weeks after mid-season
L – Late: Bloom commences 2-4 weeks after mid-season
VL – Very Late: Bloom commences more than 2-4 weeks after mid-season
RE – Rebloom: Many varieties will rebloom or put up additional bloom scapes at some time after their initial bloom. Some may rebloom more than once. Rebloom is not considered when calculating season of bloom.
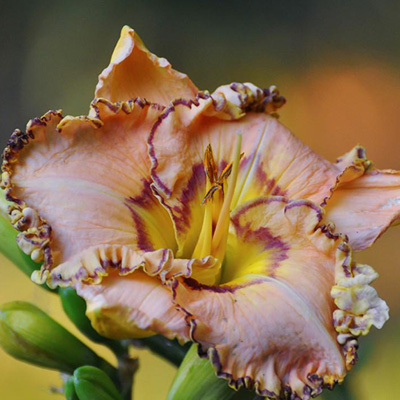
COLOR AND PATTERN
There a number of color patterns in daylily flowers. Patterns refer to petals and sepals. Throat color and color of stamens may be different.
Self: Petals and sepals are all of the same color.
Blend: Flower segments are a blend of two colors.
Polychrome: Color is an intermingling of many colors.
Bitone: Petals and sepals are the same color but differ in shade or intensity. Petals are darker than sepals. A Reverse Bitone has lighter petals than the sepals.
Bicolor: Petals and sepals are of a totally different color. Petals are darker than sepals. A Reverse Bicolor has petals lighter than sepals.
Eyezone: A band of color circling the throat that differs from the petal/sepal color.
Band: The darker eyezone color appears on the petals, but not the sepals.
Eye: The darker eyezone color appears on both petals and sepals.
Halo: The darker eyezone color is faint or only lightly visible.
Watermark: An area of lighter color in the eyezone.
Edged: A contrasting color on the segment edges. The color may or may not match the eyezone, if there is one.
Picotee: This is another term for Edged.
FORM
Single: Flower with the normal complement of six segments (3 petals and 3 sepals).
Double: Flower with more than six segments.
Polytepalous: Flowers with more than 3 petals, with a matching number of sepals. The number of anthers will match the total number of petals/sepals.
Spider: Petals and sepals are much longer in proportion to their width. Petal length to width ratio must be at least 4.0:1.
Unusual Form: Flower displays unique characteristics on at least 3 petals or 3 sepals, but does not meet the criteria for the Spider classification. Unusual forms include Crispate (pinched, twisted or quilled segments), Cascading (narrow, curling or cascading segments), and Spatulate (segments are much wider at the end).
Daylilies have been called the ‘perfect perennial’. They will grow in almost any type of soil from clay to sand. They are hardy, resistant to most diseases and pests. The following are general guidelines which should give you the best results.
PLANTING
Daylilies bloom best in full sun. They will tolerate partial shade, but at least six hours of direct sun per day is preferred. Darker colors may benefit from partial shade during the hottest part of the day.
The area where you intend to plant your daylilies should be worked into a good loose condition as deeply as you can, preferably to a depth of at least 12”. Amendments such as well composted organic material should be mixed thoroughly with the soil. Raised beds may be constructed using landscape timber or treated wood, then filled with suitable potting mixes.
Generally, when planting, plants should be spaced 18 to 24 inches apart. Some cultivars multiply very fast, and you clumps will soon become crowded if planted too close together.
Prepare the plant by dividing into two to three fan groups. Trim foliage to a length of 6-8 inches for easier handling. Dig a hole slightly larger than the root mass. Make a mound in the center of the hole. The mound should be high enough to bring the crown of the plant to ground level. Set the daylly in place with the roots spread around the mound. Work loose soil around and between the roots as you cover the plant. Firm the soil, eliminate air pockets, then water well. After the initial soaking, it is best to not water again for several days to allow time for the formation of the small roots which will absorb the moisture.
CARE AND FEEDING
Daylilies are relatively drought tolerant but perform best with adequate watering. The equivalent of one inch of rain per week is the optimum.
The type and quantity of fertilizer required is dependent on the conditions in your garden. A soil test is the most accurate way to determine your needs. In general, consider a 10-10-10 fertilizer in spring, and a lower nitrogen fertilizer such as 3-12-12 in the fall. Older clumps should be fertilized more heavily than newer plantings.
Although it is not essential, mulching is very helpful in improving soil, retaining moisture and weed control. Care should be taken when mulching to not cover the crown of the plant, as this can lead to rot.
Pre-emergent herbicides may be applied if you are not growing from seed. Layers of newspaper, covered with mulch, can also be effective for weed control.
Daylilies increase by developing additional fans. As the clumps mature, they may need to be divided. Substantial increase in the size of a clump may decrease the productivity of blooms as the fans compete for the available nutrients. When dividing, dig up the entire clump. Trim the foliage to a 6-8” length for easier handling. Washing the root mass will usually make the task easier. Gentle twisting and pulling will usually separate the fans, although in some cases it may be necessary to cut the fans apart using a sharp knife. If cut, it is advisable to apply a sulfur compound to the cut areas prior to replanting.
One of the added attractions to growing daylilies is the ease which with they may be crossed to develop new and different flowers.
Some basics:
Diploid (Dip) and Tetraploid (Tet) daylilies will not cross.
Plants grown from daylily seeds, while they may be similar, are not duplicates of either parent plant. Each seed, even those in the same pod, carries its own unique combination of genes, and may be very different from both the parents and siblings.
Keep good records of your crosses. Tying a small paper tag to the base of the pod parent flower is one economical method. Keep this identifier with the seeds through final planting.
Not all daylilies are fertile. Some will only be fertile as either a pod or a pollen parent.
Be patient! It may be as many as two years from planting of the seed until you see the first bloom from your effort. But the thrill of seeing that first bloom, knowing that there is no other exactly the same, makes it all worthwhile.
The Mechanics
Daylilies are very easy to hybridize. Simply pluck the stamen from one (the pollen parent) and brush the pollen on the tip of the pistil of another (the pod parent). Do not remove the spent bloom from the pod parent. It will drop off when its task is complete. If the pollination was successful, a small, green, barrel-like seed pod will begin to grow in two to three weeks. The pod will continue to grow, and when the seeds are ripe, the pod will begin to dry and split. Harvest the pod before it splits open completely. Collect the seeds, let them dry, and then plant. The seeds may be refrigerated for later planting. Plant seeds in a good potting mixture, keep moist but not overwatered, until they sprout. When they are large enough, transplant into your garden.